Pemula25 menit
Creating Your First Work Order
Step-by-step guide to creating a work order.
Creating Your First Work Order
A work order is the backbone of maintenance in OpexMX — it captures what needs doing, on which asset, by whom, and by when. This lesson walks through creating one end to end.
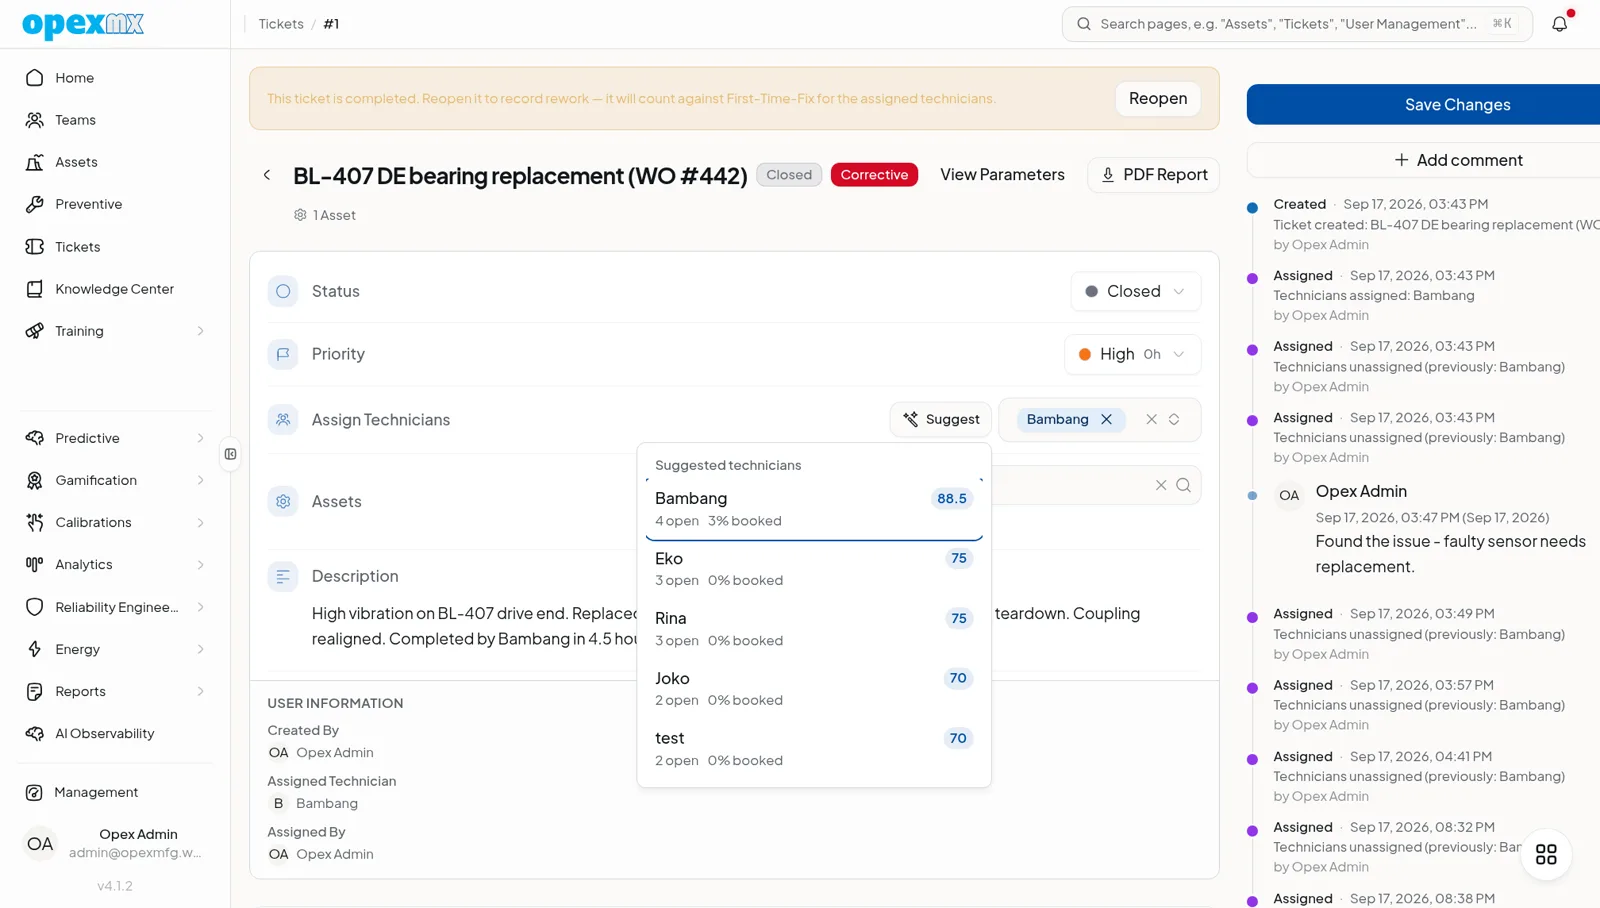
What Goes Into a Work Order
Every work order carries the essentials:
- Title — a short, scannable summary ("Replace conveyor motor bearing")
- Description — the problem or task in detail, with symptoms and context
- Asset — the equipment the work is tied to
- Priority — how urgent (low, medium, high, critical)
- Assignee — the technician responsible
- Due date — when the work should be finished
Creating One
- Open Work Orders in the sidebar and click New Work Order
- Give it a clear title and description
- Pick the asset it concerns (or leave it unassigned for general work)
- Set a priority that reflects real urgency
- Assign a technician and a due date
- Save — the work order is now live and trackable
Work Order Types
- Reactive — unplanned, "something broke" work
- Preventive — scheduled maintenance to prevent failure
- Inspection — routine checks and audits
- Corrective — follow-up repairs found during an inspection
Tips
- Write titles the way a technician would search for them later
- Attach photos of the issue so the assignee arrives prepared
- Link the parts you expect to use so inventory stays accurate